IceWM Theme Creation Howto
Adam Pribyl, covex@lowlevel.cz
MJ Ray, markj@stu.uea.ac.uk
Last updated for IceWM-3.9.0.
What is an IceWM theme?
An IceWM theme is made up of these parts:
-
one or more theme files, including a "default.theme", which should specify all IceWM options related to appearance (color definitions) and behaviour, in the usual preferences format of "Option=Value" on each line; (some of the preferences/values are not allowed to change in theme specification)
-
a collection of pixmaps (XPM and PNG files) which are used for building the window decorations;
-
a collection of pixmaps (XPM and PNG files) for cursors, special icons, mailbox and task bar;
It should not contain a large backdrop graphic or specify any options not related to its appearance.
Both the theme file(s) and the decoration pixmaps live in a single
subdirectory under ICE-LIB/themes, where ICE-LIB is either the IceWM
system directory or a users' .icewm directory. Themes then appear in
the "Themes" item on the program menu. The default theme on startup is
set in the theme file or by the -t option in the command line.
Types of IceWM themes
There are several types of theme possible, chosen by setting the "Look" option to one of the values: warp3; warp4; win95; motif; nice; pixmap; metal; gtk. These each give you different levels of control over the appearance and require different numbers of pixmaps. (Actually, pixmap, metal and gtk are similar.)
In this howto, we will cover the most general pixmap Look,
because other looks generally need a subset of the pixmaps. Look in the
system ICE-LIB/themes directory at the basic themes if you want to
know how they compare.
Pixmaps creation tools
Most people use some combination of a paint package - GIMP and xpaint can create XPM and PNG files - and a text editor to create and correct XPM pixmaps. If the text editor has configurable syntax highlighting and the pixmaps are smaller than your screen, this is a simple way to work closely on a zoomed preview.
Pixmap requirements
(Hint: pixmaps are quite simple files, really. If you don’t know them, try looking at a few: there’s a header giving image and palette sizes, then the palette, then the image.)
Pixmap naming is methodical, even if it looks a little unfriendly. Each part of the window is a separate pixmap and the start of the name specifies which part (eg "close" is the close button and "frame" is a window frame section). The next letter is "A" for an active (focussed) window version or "I" for an inactive window. Some parts (frame sections and title bars) then have a character to denote which part it is. Finally, you have ".xpm" on the end.
You can use XPM and PNG files with all available features like transparency. This way you can create particulary transparent frames, titles, buttons, etc.
Title Bar Buttons
Which buttons are prepared in your theme is specified by the TitleButtonsSupported option in the theme file. TitleButtonsLeft and TitleButtonsRight (see preferences file) says which buttons to place where (you can use less buttons than you have under TitleButtonsSupported). The letters are shown after the button names:
-
close (x)
-
hide (h)
-
maximize and restore (m)
-
menuButton (s)
-
minimize (i)
-
rollup and rolldown (r)
-
depth (d)
and are followed by A.xpm or I.xpm as before.
There is one more suffix for button pixmaps only - "O". It
specifies pixmap for button when mouse cursor is over this button.
For this feature to work you need to set RolloverButtonsSupported=1.
Please set your theme’s TitleButtonsSupported to include all buttons
you have and not more.
Each button has two appearances in a pixmap-look theme: a normal and a pressed version. The pixmaps used are slightly unusual to accommodate this, being twice the size vertically, with the pressed version below the normal one. So, if you are using 16x16 buttons, your pixmaps will be 16x32 and be two pixmaps in one, effectively.
Frames
Window frame pixmaps are "frame" followed by A or I and a location specifier.
Dialogue box frames are "dframe" instead. The locations are fairly logical and same for both frames and dframes:
              ,TL --------- T -------- TR.
              |                          |
              L                          R
              |                          |
              `BL --------- B -------- BR'
(think Top, Bottom, Left and Right)
Title Bar
The title bar is composed of pixmaps, specified as "title", then A or I, then the location.
Valid title bar pixmaps are now:
              ,-----------------------.
              J L  S  P   T   M  B  R Q
              `-----------------------'
where the title text appears on top of the T pixmap (think basic letters Left, Space, Title, Middle, Bulk, Right). Space fills everything between L and P pixmap, same applies for Bulk.
You do not need to define all frames and titles as pixmaps. Instead of this you can use definitions of colors and sizes in default.theme file. (Then you are defining borders and border colors for frames, etc.)
Border and frames summary
frame?TL |
frame?TL |
frame?T |
frame?TR |
frame?TR |
frame?TL |
TITLE BAR (see below) |
frame?TR |
||
frame?L |
frame?R |
|||
frame?BL |
frame?BR |
|||
frame?BL |
frame?BL |
frame?B |
frame?BR |
frame?BR |
Where each ? is either A or I (for active/inactive). The title bar is:
title?J |
menuButton |
title?L |
title?S |
title?P |
title?T |
title?M |
title?B |
title?R |
"buttons" |
title?Q |
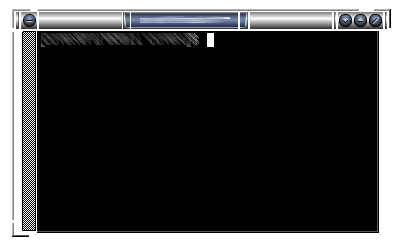
Here is an example of a possible Infadel theme frame and title decomposition:
Taskbar themeability
The taskbar in IceWM is also themeable. You need four pixmaps to change whole taskbar look (the names are self explaining):
    taskbarbg.xpm
    taskbuttonbg.xpm
    taskbuttonactive.xpm
    taskbuttonminimized.xpm
For workspace buttons there are:
    workspacebuttonbg.xpm
    workspacebuttonactive.xpm
You can also change the Start button.
start.xpm
("icewm.xpm" and "linux.xpm" are now deprecated.)
Buttons for windows list and show desktop.
    windows.xpm
    desktop.xpm
The default toolbar button:
toolbuttonbg.xpm
All pixmaps for the taskbar need to be in the subdirectory taskbar. The size of the pixmaps does not matter, but you need to take in mind that only the appropriate part will be used. E.g. for taskbarbg.xpm only the upper 25 pixels (height of taskbar) will be used from the pixmap on a single line taskbar. If the pixmap is smaller than the required size, then it will be scaled to the whole area it should fill.
start.xpm |
taskbuttonbg.xpm |
taskbuttonactive.xpm |
taskbuttonminimized.xpm |
taskbarbg.xpm |
12:34 |
Clock
Even more, you can set clock to use pixmap digits. If you want to use pixmap digits you need to put:
    a.xpm
    colon.xpm
    dot.xpm
    m.xpm
    n0.xpm ... n9.xpm
    p.xpm
    slash.xpm
    space.xpm
into the ledclock subdirectory under your theme.
Pixmaps heights should fit the taskbar.
APM
APM battery status can also use pixmap digits. Except those for clock you can define
percent.xpm
for "%" character. Place it also under ledclock.
Mailbox Icons
Mailbox icons are also themeable. There are five states for this icon.
    errmail.xpm
    mail.xpm
    newmail.xpm
    nomail.xpm
    unreadmail.xpm
Pixmaps should be 16x16 pixel for now, stored in the mailbox subdirectory.
Collapse button
Since IceWM 1.2.17 the taskbar has a collapse button. This button is themable since 1.2.22. Use:
    collapse.xpm
    expand.xpm
and place them in the taskbar subdirectory.
Resizing taskbar
The taskbar height could be changed in two ways. Increase it either by
making the taskbar "start.xpm" icon higher (in 1.2.23 it is broken for
TaskBarDoubleHeight=0) or by changing the SmallIconSize pref.
The taskbar height is SmallIconSize + 9 pixels. Only if the height
start.xpm is higher than that, is it set to the height of start.xpm
plus 5 pixels.
Consider that when the taskbar height is changed, not all taskbar parts
are changed accordingly (e.g. the monitors).
Icons
Very complex themes can also contain their own icons for folder, file or other apps in icons subdirectory. By default 16x16 and 32x32 icons are used. Nameing is just like this:
    folder_16x16.xpm    for folder icon size 16x16 pixels
    folder_32x32.xpm    for folder icon size 32x32 pixels
In e.g. menu file then it is enough to say
    menu "Mail Agents" folder {
    }
and folder icon with appropriate size and name will be used. IceWM also accepts PNG files as icons, but you have to explicitely put the name and/or path (if you do not add path to icons to IconPath pref).
    menu Applications "/home/test/my icons/myfolder.png" {
    }
The default sizes of icons could be set with the *IconSize options. Acceptable values are 16, 22, 24, 32, 48, 64 and 128. Note that menuIconSize must be similar to the menu font height, usually 16. When menuIconSize is equal to smallIconSize, it is cached. Furthermore, smallIconSize should be smaller than largeIconSize and largeIconSize should be smaller than hugeIconSize. Note that these also affect the icons that are read from the _NET_WM_ICON property from application windows. See the EWMH standard on page 28.
Other Buttons and Backgrounds
Default active and inactive buttons:
    buttonA.xpm
    buttonI.xpm
Menu pixmaps:
    menusel.xpm
    menusep.xpm
    menubg.xpm
Background for dialogs and the window list:
    dialogbg.xpm
    listbg.xpm
    logoutbg.xpm
    switchbg.xpm
Cursors
There are 15 possible cursors. Three direction cursors:
    left
    right
    move
Eight resize cursors:
    sizeB
    sizeBL
    sizeBR
    sizeL
    sizeR
    sizeT
    sizeTL
    sizeTR
Four scroll cursors:
    scrollD
    scrollL
    scrollR
    scrollU
Here the capitals have the following meaning: B=bottom, D=down, L=left, R=right, T=top, U=up.
Cursors are placed in the cursors subdirectory. There are two file formats. If a cursor file ends in a .xpm extension it must be a XPM file. Remember to define the cursor hotspot.
    /* <width> <height> <colors> <chars-per-pixel> <x-hotspot> <y-hotspot> */
    "16 16 2 1 10 4",
Instead, since version 3.9.0, a cursor file can be without an extension. Then it must be a Xcursor file. This can be generated using xcursorgen or with the icecursor program that is in the source distribution. This format supports alpha transparency, allowing for smooth edges and visually appealing cursors that blend well with different backgrounds.
Gradients
If you want to use gradients you have to have IceWM compiled with gradient support. Then in theme definition file you simply include line like this:
Gradients="menubg.xpm titleAS.xpm titleAT.xpm titleAB.xpm titleIS.xpm titleIT.xpm titleIB.xpm"
Pixmaps for gradient definition can contain only a few pixels. These define what colors are used to create the gradient. For example this definition (zoomed 1:10):

looks like this when used in titleAS.xpm:

You can use almost any picture, but you have to take in mind that this image will be blurred inside e.g. whole S area. (This is different to non gradient themes - there S images are not blured, but placed many times in S area - it fills the area like a repeat pattern.)
Themeability by colors
By color settings in preferences you can set the color of almost every part of IceWM. You can set colors of Normal, Active, Minimized and Invisible buttons and text colors for same categories of buttons. (Search for Color*TaskBar options in preferences.)
You can also set colors of monitors and clock background + font. Colors for frames, taskbar, menu, tooltips, dialogs, listboxes, scrollbars and desktop. You can combine pixmap and color themeability as you wish. For details you need to look trough the IceWM preferences file.
Colors are specified in RGB hex format like ColorApm="rgb:12/89/ef".
Since 1.6.0 an alpha component for translucency effects can be added
in two ways. Either add an opacity percentage between 1 and 100
enclosed in square brackets like ColorApm="[80]rgb:12/89/ef",
or use RGBA hex format like ColorApm="rgba:12/89/ef/cc".
default.theme
The default.theme file is actually another preferences file, just like
ICE-LIB/preferences. There are three options which are customarily put
at the top of default.theme:
        ThemeDescripton="description of theme"
        ThemeAuthor="contact details"
        License="license type"
and I encourage you to do the same. It can also be useful to add some comments (lines starting with a hash, #) to the top of the file, suggesting other resources (e.g. backdrops) that you think would go well with the theme.
Your default.theme file should set all options concerning appearance, whether you think they will be used or not. It should not interfere with the configuration of icewm unless it is essential to your appearance. For example, it is not normally OK for a theme to decide to show the TaskBar (this is usually left to the user’s preferences file), but a Windows95 lookalike theme would want to show a single-height task bar for sure and set the look of the clock, etc.
If you wish, you can include other .theme files in your theme. These
will appear on the optional submenu for your theme (similar to how
"Restart" is on the optional submenu of "Logout") and give the user
several possible variations on a theme.
For examples you can see preferences file from IceWM package which is pretty self explaining.
Testing your theme
When you are ready to test your theme for the first time, you need to cause icewm to rebuild its menus, so that your new theme appears in the "Themes" submenu. You can do this by either restarting icewm, or by changing themes to something else, then you can change to your theme. After changing you theme file, you must do the same.
Packaging your theme
Change to ICE-LIB/themes and do
tar czvf themename.tar.gz themename
to make a tarball of your theme.
The home for IceWM themes is at box-look.org these days.
This Document
The IceWM Theme Creation HOWTO is copyright 1999-2000 MJ Ray and 2003 Adam Pribyl, and may be freely reproduced unaltered but with annotations. The latest version should always be on the IceWM Website. If you wish to improve this document, please send a message to covex@lowlevel.cz.